
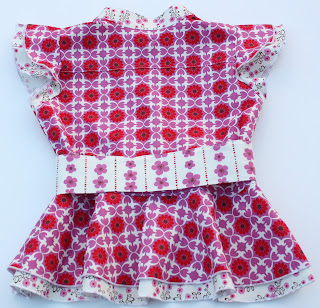
Amy Peplum Blouse by LilyBird Studio
/Today We have Melissa of Emby Designs here to share her review of the brand new release from LilyBird Studio: the Amy Peplum Blouse. This top is simply stunning, I can't wait to make it myself!!! Cecilia has decided that she wants to give our readers a special discount for a limited time. For THREE DAYS ONLY, use the code AMY30OFF to get 30% off the purchase price on this pattern. This coupon code will expire the end of May 30th. Purchase from Etsy HERE. Happy Sewing!!!
-----------------------------------------------------
Hello Pattern Revolution Peeps! My name is Melissa. I am the girl behind Emby Designs, which is named after my two princesses, Emma & Abby. (You can also find me here on Facebook.) I stay home with and homeschool my two beautiful princesses. My interest in sewing developed after having my oldest, but over the last few years my love for it has really grown. When I have time to sew for others I love to create beautiful things for other little girls to enjoy, too!
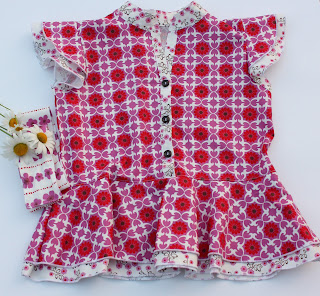
I was thrilled to get the opportunity to review a new pattern coming by The Lily Bird Studio called Amy's Peplum Blouse. When I first saw the picture I knew I was going to love this little number. With her cute fitted design, fluffy peplum and flutter style sleeves, she is one chic top that your girl is sure to love as much as mine does.

I am going to be straight with you ladies. I was a little concerned about how difficult some of the steps of this blouse might be as I don't do things like plackets and collars too often. After all was said and done though, it wasn't too bad. I mean, I didn't have to grab my best/worst friend (aka, my seam ripper), I didn't have to head to the fridge for a glass of wine, nor did my sailor mouth show up for the party! I did have to fight with my collar a bit because I couldn't quite get mine to work the way the pattern stated. I had to work it some, but it did all come together...and quite nicely I think. But hey, curves are one of those things you gotta hold your mouth just right anyways...with your tongue slightly stuck out...and all the planets have to align just right. HA! So yeah, couple that with the fact that I don't often do collars, I can't say my issue had anything to do with the pattern, but more just my lack of history with sewing collars This little hiccup won't stop me from making more of these though, especially since I imagine the next one will be much easier since I've got one under my belt already!
All in all I say this was a pretty simple pattern. The step by step directions paired with great photos showing you each step made it very easy to follow. I will sometimes find myself reading something a few times to make sure it has "clicked" with me before proceeding...though in my defense, I often find myself sewing in the wee hours of the night when my mind has probably long since signed off for the evening... but I didn't find myself doing much of that here, so that just confirms for me that it's simple to follow. I would have to rate this more toward the intermediate level because it does have buttons/buttonholes, the collar I think would be a little tricky for a beginner, and the pattern does call for the use of a serger for rolled hems. However, those things being said...the pattern does show you how to use snaps (which you can find at your local Hobby Lobby, Joanns, or other such place), the collar is totally doable - just have patience, and you could skip the rolled hem on the serger and do a very narrow hem on your sewing machine which she DOES cover in the pattern when talking about the hem on the sleeves. So...you could use some of the alternatives she lists in her pattern and make this simpler if you are a beginner wanting to give it a try.
So now, let's get to the nitty gritty of this.
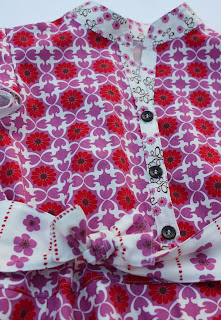
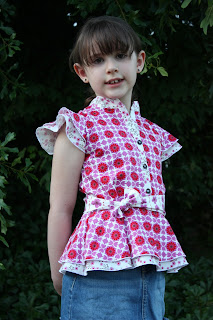
Let's talk more about what all this pretty little lady has. We'll start at the top, with my "hiccup"! This cute little collar. I do love her. I really don't think by looking at her here, that you would ever know she tried to give me a run for my money. It's kinda like my big girl wearing her here, she looks so cute and sweet, but this mama knows the drama queen that sometimes hides behind the pretty little smile!
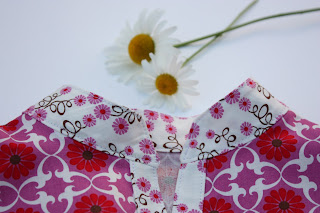
(That same big girl, being sweet, had to pick some daisies to go in the picture with her pretty new blouse.)
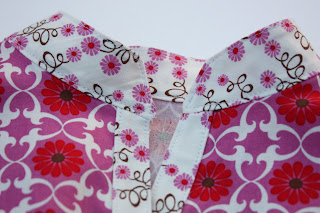
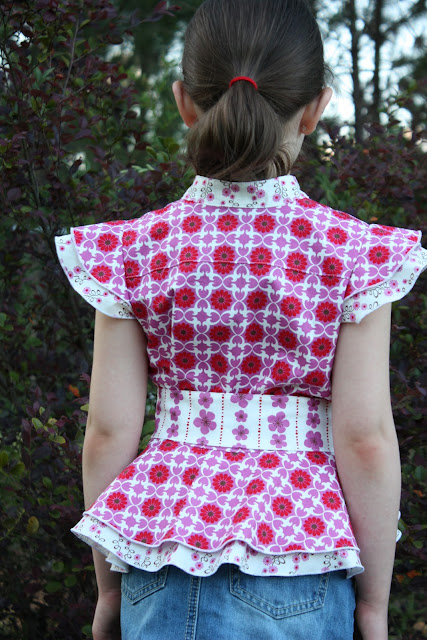
And here's the collar from the back. This also shows you the next little detail about this cutie...the back yoke. I love how the back piece is separated like you'd see on a store bought, button down shirt. I think it just gives this an extra notch up. I'm not sure the history behind having the back of a shirt this way, or if there even is one (hmm, do I smell a "research project" for my research lovin' self?), but something about it just makes me smile!
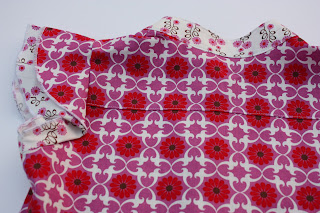
I mean, isn't she just so pretty?

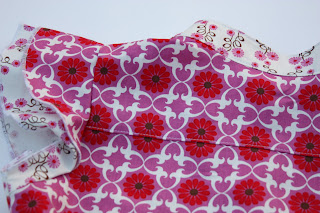
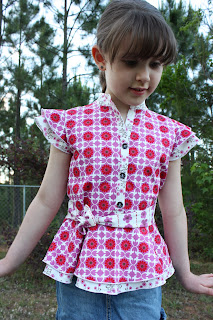
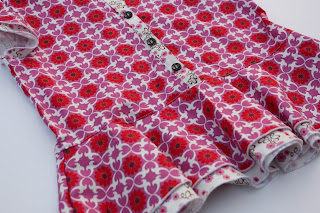
Now let's talk about the darling little flutter sleeves. You've seen them from the back view there, but let's check them out again from the front and side...and back on my big girl! (Who by the way, is 7 and wearing the size 7 here.)


C'mon, how can you NOT love those cute little sleeves? I just adore them. They make my heart flutter...get it, flutter...flutter sleeves...tee hee...yes, I'm corny, but that's okay :)
So, what have we next? Ah yes, how about the little placket down the front with three cute little buttons on it. Now, even though I was a little worried about this giving me some fits, it really didn't. You have to be a little patient with it and your iron (watch those fingertips ladies!), but with a little love and care it comes together quite simply.


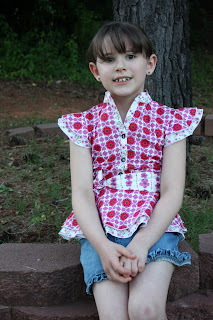
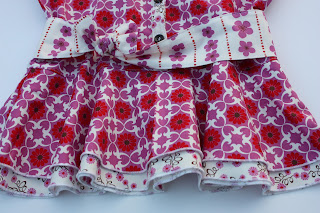
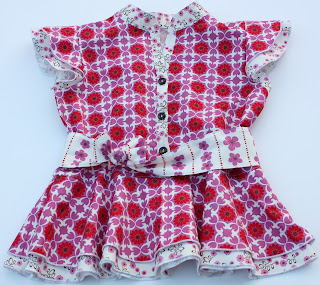
Well ladies, that takes us to the bottom of this prissy little number...the peplum. Peplum...that's just fun to say...as I think of Pepe Le Pew and his little voice. C'mon, say it a few times in your best Pepe voice, you know you wanna! So honestly, until recently I didn't even know WHAT a peplum was. I first heard some ladies in a sewing group I'm part of talking about it and I had to go get my research on to figure out what they were talking about! Basically, it is the little flare, "skirt" part of the blouse at the bottom. Simple enough, huh? Yep! I do love the little "twirl" at the bottom of this. I mean, if your girls are ANYTHING like mine, they LOVE them some twirl. They have to test the twirl factor of almost everything I put on them! I mean look at those hands in the picture above...can we dainty little twirl pose? I think so!

Such cuteness I tell ya!!
And look how it flares out and just lays so pretty!
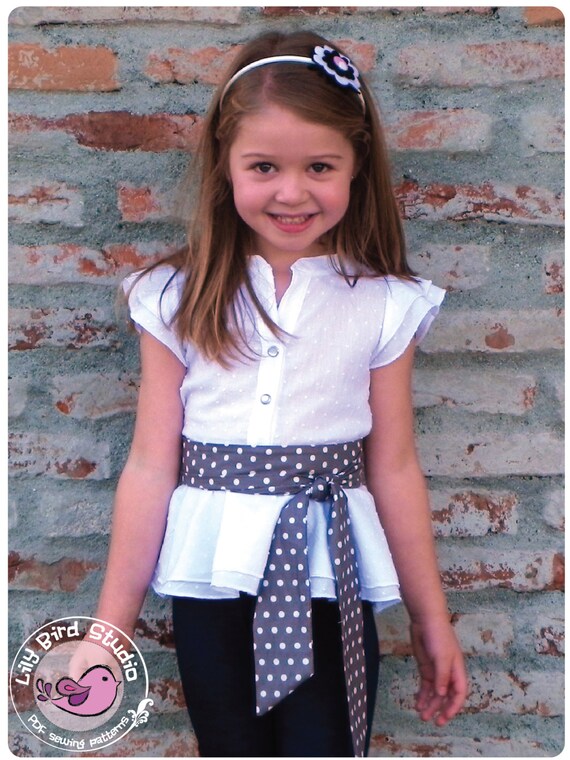
And last but not least is the little sash. It is a very simple rectangle piece that is not attached in any way to the blouse, so you could opt to leave it off if you would like.
Here's a few shots of her without the sash.

(oopsie, excuse my table peeking in the corner!)
I really did enjoy sewing up this darling little blouse...not that you didn't pick up on that during all of this! I will be making more of these, most definitely. Oh, and did I mention the size range of this pattern? I don't believe I did! This cutie comes in 12 months up to 10 years! How awesome is that? Pretty awesome, huh? Yep, I thought so, too! Now that my girls are getting older I find myself looking for patterns that go up to size 10 or 12 so that I know I'm going to get lots of use out of them still. This one certainly fits the bill! Oh, and the possibilities on this are crazy. Though I jazzed her up here with the two different fabrics on the sleeves and peplum (like shown on the pattern) and the contrasting collar and placket, you could totally make this in all one fabric. I bet it would be darling in a swiss dot fabric...which I believe she mentions in the pattern as a fabric choice. Seriously, just put on those creative thinking caps and oh the variations I am imagining here.
Oh ladies, there is one thing I want to point out about this pattern that I wish I had paid more attention to before printing. Now, I KNOW there have to be other mamas out there like me that try to print in black/white if they can and save that color ink because, seriously, have you LOOKED at the price of ink cartridges lately? GEEZ LOUISE!!! And let's face it, we have to save where we can because then it's more money for fabrics and patterns, right? So, when you go to print these pattern pieces I would suggest using that color ink and printing these pages out in color instead of black/white. Why you ask? Well, the lines on the pattern are not marked with the size numbers in any way. The lines are color coded...so each size has its own color line. On most of the pieces, even in black/white, it is okay. However, on some of the pieces my eyes were crossing trying to make sure I was following the correct line...like the sleeve pieces where all the curve lines are crossing and running together and such. Just take a look at it before you print and be sure what will work best for you. I just know for me, I will print out another copy in color to make it easier on my eyes next time.
Well ladies, I think that about covers it. I mean, are you sick of me going on and on yet? I definitely recommend picking up this pattern. It truly is just adorable. I don't think you will be disappointed! I'll leave you with a few more pictures...just because...well, I always love to see pictures of the finished product!


That's all ladies. Thanks for reading and I hope enjoyed the review. Happy sewing!!
-Melissa


